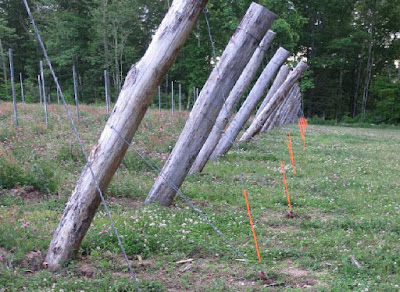
In looking back at my blog, we have been thinking about our endposts since before the dawn of our vineyard. The blogpost Endpost Designs was written on April, 2013 even before our vineyard was planted. Little did we know at that time that we would select the anchored endpost design, because out thoughts were leaning toward putting in an H-brace. Reality set in as we thought about the costs of putting in black locust for our endposts. Black locust is a good choice for endposts unless you find out like we did that straight black locust is difficult to find and it can cost up to $25.00 a post. We were able to find a dealer in Barkhamstead, CT who was selling reasonably straight black locust for $10 for a 10-foot length. We ordered and received our trellising material in late June, 2013 where it sat for almost 1 year. We began putting in our lineposts in May, 2014 and our endposts in November, 2014.
One thing that we were unclear about was how to secure the endpost to the ground anchor. My husband settled on the GPAK system from GRIPPLE. Our favorite go-to farmer friends, the Holmbergs also recommended that we use the GPAK.
So, my husband began installing the GPAK in late May.
I took a picture of what the close up of the endpost now looks like with the GPAK trellis anchor installed.
There are all kinds of endpost designs out there, but when we were trying to determine exactly how to finish it off, the devil is really in the details.
My husband purchased these fasteners from Big Heel Fasteners, the link provides much more information. The nice thing about these fasteners is that you can screw it in. If you don't like where you put it on your endpost, you can easily unscrew it and reposition it.
Lastly, in order to make the GPAK wire visible, to avoid running into it, we wrapped the wire with fluorescent orange tubing.
It's only taken us 3 years!


No comments:
Post a Comment